Configure OVOC Server with NAT IP Address per Interface
This option configures the OVOC server with a physical NAT interface for connecting to devices that are deployed behind a NAT in a remote Enterprise or Cloud network.
|
●
|
When the "Cloud Architecture" mode is enabled for a specific interface, the NAT configuration is not relevant for this interface. |
|
●
|
NAT configuration supports IPv4 only. |
|
➢
|
To configure OVOC Server with Public IP address: |
|
1.
|
From the Network Configuration menu, choose NAT, and then press Enter. |
Configure NAT IP
|
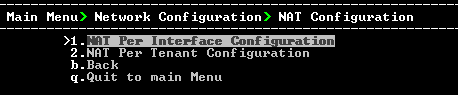
2.
|
Choose option NAT Per Interface Configuration. |
NAT Per Interface Configuration
|
➢
|
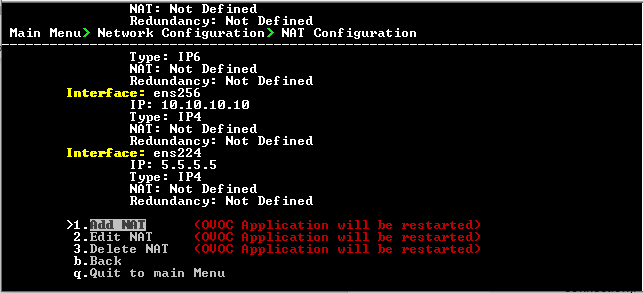
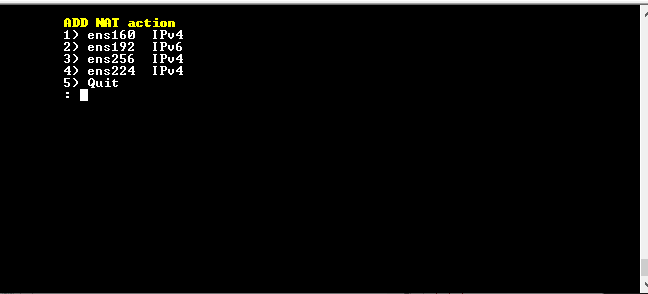
To add a NAT interface: |
Add NAT
|
2.
|
Enter the NAT interface that you wish to add. |
|
3.
|
Enter the NAT IP address, and then press Enter. |
|
4.
|
Type y to confirm the changes. |
|
5.
|
Stop and start the OVOC server for the changes to take effect. |
|
➢
|
To edit a NAT interface: |
|
2.
|
Enter the NAT interface that you wish to edit. |
|
3.
|
Enter the IP address of the NAT interface, and then press Enter. |
|
4.
|
Type y to confirm the changes. |
|
5.
|
Stop and start the OVOC server for the changes to take effect. |
|
➢
|
To remove a NAT interface: |
|
2.
|
Enter the NAT interface that you wish to remove. |
|
3.
|
Type y to confirm the changes. |
|
4.
|
Stop and start the OVOC server for the changes to take effect. |